
Pick up wall
Grips walls and wall openings
Button: 
Command name: GripWall
Walls:
-
Pick up the points with the option Inside, clockwise or Outside, clockwise.
Note:You can define walls such as windows as a deduction area; the points tapped must be inside a wall. Set the corresponding U-value and the wall thickness.Example 1: In the following example, an external wall is tapped with the setting External, clockwise.
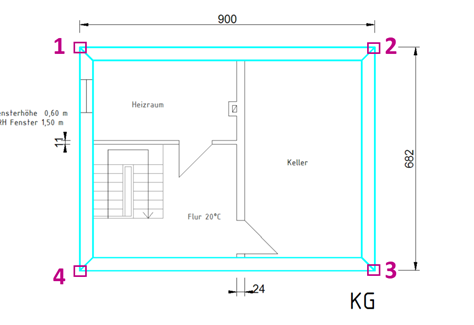
- Start the tapping process by left-clicking from the top left corner.
- Grab all (2,3,4) outer corners clockwise with a left mouse click and end at the first 1 grabbed point.
- The walls that have already been tapped are displayed in colour.
- The function of tapping the outer wall is cancelled with the right mouse button or the ESC key.
- The tapped outer walls are displayed in a greyish colour.
Tip:You have the option of changing the colour in the layer manager. To do this, open the 1 Layer Manager and change the colour in the relevant 2 layer.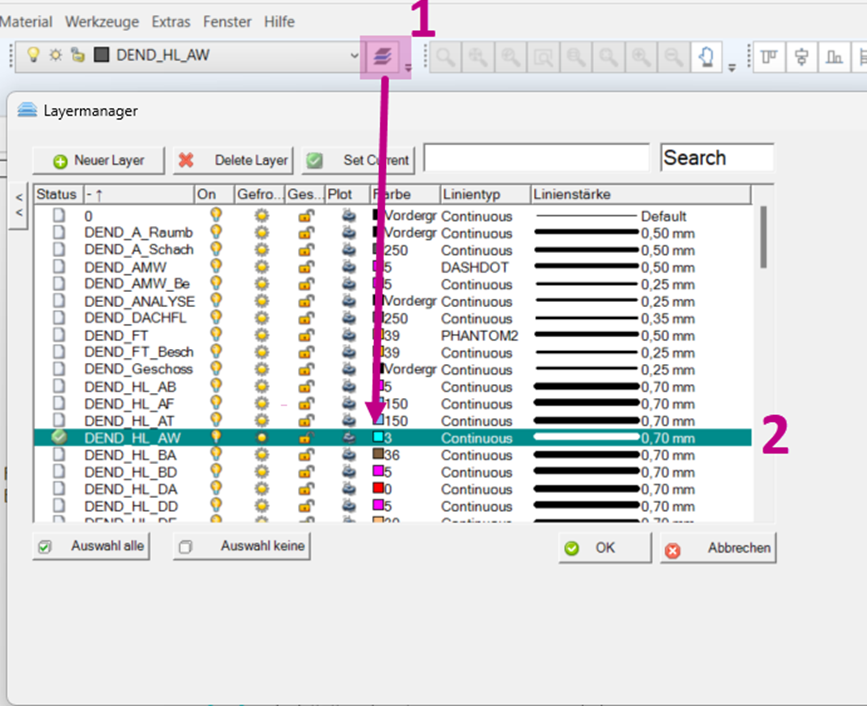 Example 2: Colouring interior walls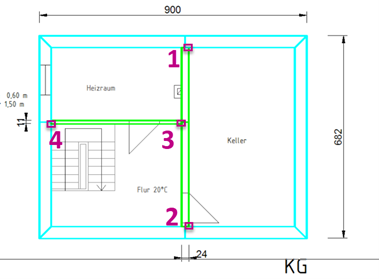
- Start the tapping process by left-clicking 1 on the inner wall.
- End the tapping process at the end of the 2 wall with the right mouse button or the ESC key.
- Start the IW command again.
- Change the U-value to inner wall 11.5 and tap the wall using two points (3+4).
- The walls that have already been tapped are displayed in colour.
- End the tapping process with the right mouse button or the ESC key.
- The tapped outer walls are displayed in green.
Wall breakthroughs:
-
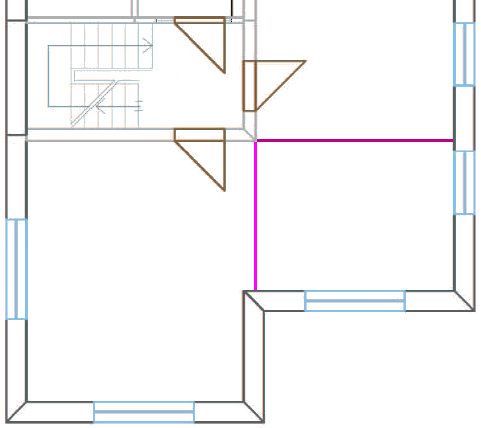
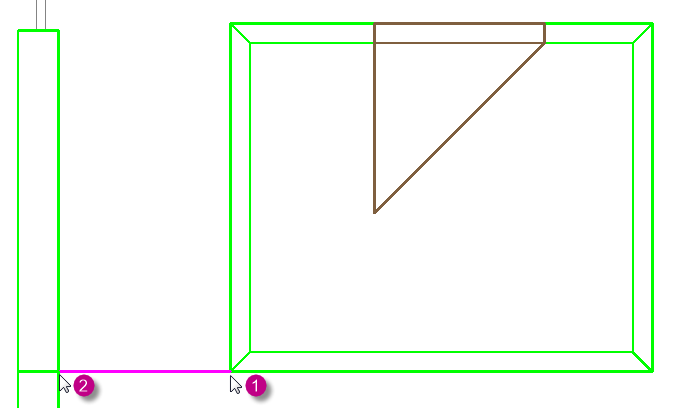
Tap the wall openings. Set a wall thickness of 0 cm for wall openings.
The wall openings are shown in pink.
-
For interior rooms, pay attention to the connecting line between an interior wall of the interior room and a wall of the enclosing room. For example, place the starting point (1) of the wall opening at the outer corner of the wall of the interior room.
Dormer wall:
-
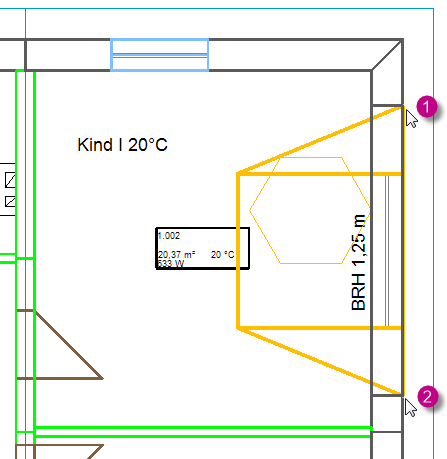
Make the desired settings and then access the dormer wall with two clicks (1, 2).
 Click here for the video - Set heating load components project
Click here to watch the video - Create dormer wall heating load project
Click here to watch the video - Creating dormers in the graphical recording