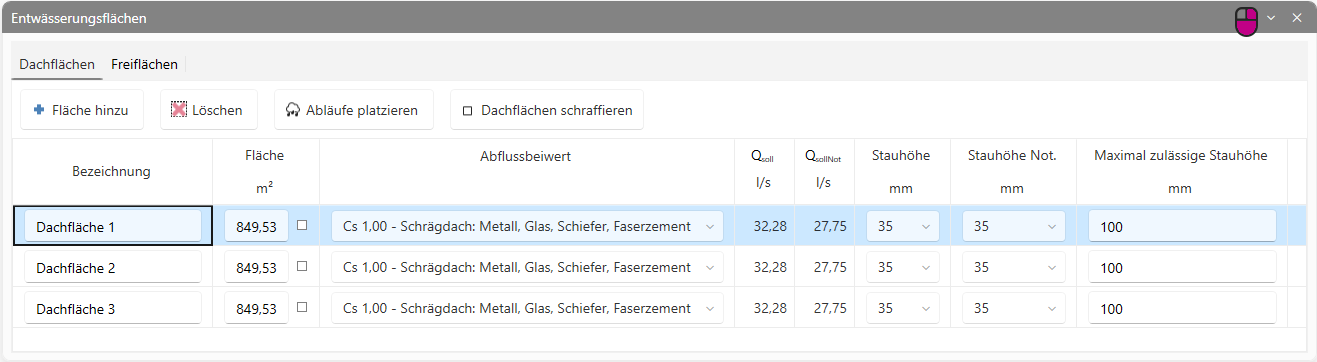
The Drainage areas window in the Drainage section is divided into two tabs.
Drawing-specific settings relating to your calculation are set in the Design options dialogue.
You can divide a drawing into construction stages so that you can later create a material extract according to construction stages.
In the Edit and Calculate work perspective, your selection in the drawing is highlighted in colour. Section properties and component properties can be displayed and edited differently from the global project settings.
The component filter allows you to quickly filter the selected components in the drawing.
Use Add area to create a new roof area in the tabular overview of the Drainage areas window on the Roof areas tab.
Delete removes selected roof areas from the table overview. In addition, the associated roof area polygons are removed from the drawing in the floor plan drawing.
The Place drains function provides you with intelligent placement routines for roof drains in floor plan drawings. Customisable default settings including plausibility checks of the value entries are made, taking individual technical specifications into account.
Provide the roof areas in a floor plan drawing with a grey hatching for an overview.
The tabular overview in the Drainage areas window on the Roof areas tab displays information on all roof areas created in the drawing.
CALHYDRA has a parameterised search function that supports you when searching for drawn sections and components in the drawing and when selecting products.
With the preview of the calculation output, CALHYDRA supports you in customising the calculation output.
With the preview of the mass statement, CALHYDRA supports you in customising the printout of the masses.
With the material editor, CALHYDRA supports you with convenient and fast determination of your dimensions.
The options wizard guides you through the settings for the design.
The Project data dialogue contains project information for the current project, for example for the project cover sheet or to determine the rainfall donations.
In the Product sequence or Product selection dialogue, select the product sequence or a product for components.
The simulation is divided into a circulation simulation for hot and cold water and a simulation of a cold water hygiene system.
The Insert drawing reference function guides you through the settings for inserting a drawing reference.