Labelling objects (Advanced)
Labels similar objects
Button: ![]()
Command name: LabelObjectIndividual
- Select the object to be labelled in the drawing.
-
In the dialogue that opens, select the characteristics that you want to include in the label.
Settings that you have made under Configure standard texts... are displayed as <Standard text> in the Labelled features field.
Use the arrow buttons to the right or left to add or remove individual labelling features. Use the double arrow buttons to add or remove all available features from the labelling. Use the vertical arrow buttons to change the order of the labelling features.
You can make manual changes to the labelling in the text field {Platzhalter} for features and constant text.
Tip:Check the changes you have made manually in the Preview field by clicking in the Preview field and the preview is updated. -
If you want to save the changes you have made as standard, tick the Save for all objects in the template checkbox on the Features tab. The settings are saved in the current labelling template.
Note:For section labelling, further options are available in the drop-down menu if the Save for all objects in the template checkbox is activated.
-
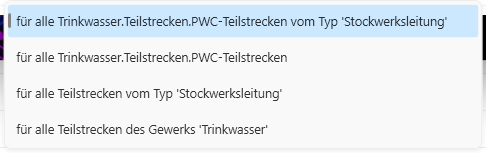
From the drop-down menu, select the sections for which the labelling settings should apply. The selection options differ depending on the trade and section type.
Table 1. Selection options for sections Example: Drinking water floor pipe
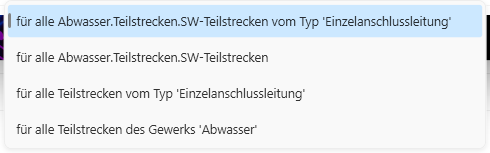
Example of individual waste water connection pipe
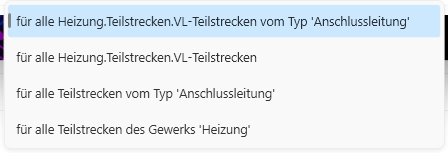
Example of a heating connection pipe
-
From the drop-down menu, select the sections for which the labelling settings should apply. The selection options differ depending on the trade and section type.
Settings tab:
-
On the tab, you can set the font (font height), orientation of the lettering, positioning of the text field and colour.
Tip:The font height refers to a scale of 1:100. A font height of 0.60 means that the font is 0.60 cm high.Tip:If you tick the Coloured checkbox, the respective layer colour of the object is used.
- If you want to label all similar objects in the same way, tick the Save for all objects in the template checkbox.
-
After closing the dialogue, click on the position where the label field is to be positioned.
Note:Use the arrow buttons to rotate the labelling.Note:You can label similar objects one after the other with the settings you have made until you end the command by pressing ESC or Enter.
Click here to watch the video - Labelling drinking water project